 66
66 Stand up, hikers, and chin up! Today, don’t forget your hiking shoes, because you go off to explore the world!
I wonder if, like me, you wake up in the morning with this adventurer’ soul? OpenTracks is provided with a functionality designed for you: planning. Indeed, it’s a map on which you can create your own route, analysing the ground in advance and the hidden treasures it contains. I will explain this, secret after secret.
Secret No. 1: Find an idea of the place
For this purpose, no need of any big preliminary research on an awful lot of sites. The simplest is often the best: Search close to home or a place that appeals to you. You only need the name of a town.
In my case, a friend of mine vaguely mentioned to me the existence of Roman remains around Roquefort les pins. Being curious by nature and keen on Roman civilisation, I decide to search in the net if these ruins are easy to find... But actually, nothing precised at the end, except that the site was to be on the outskirts of the town! But That is not the end of it, I decide to plan another hike:
I open Opentracks, I click the main menu of the application on the « Create activity » topic, then on « Plan activity ».
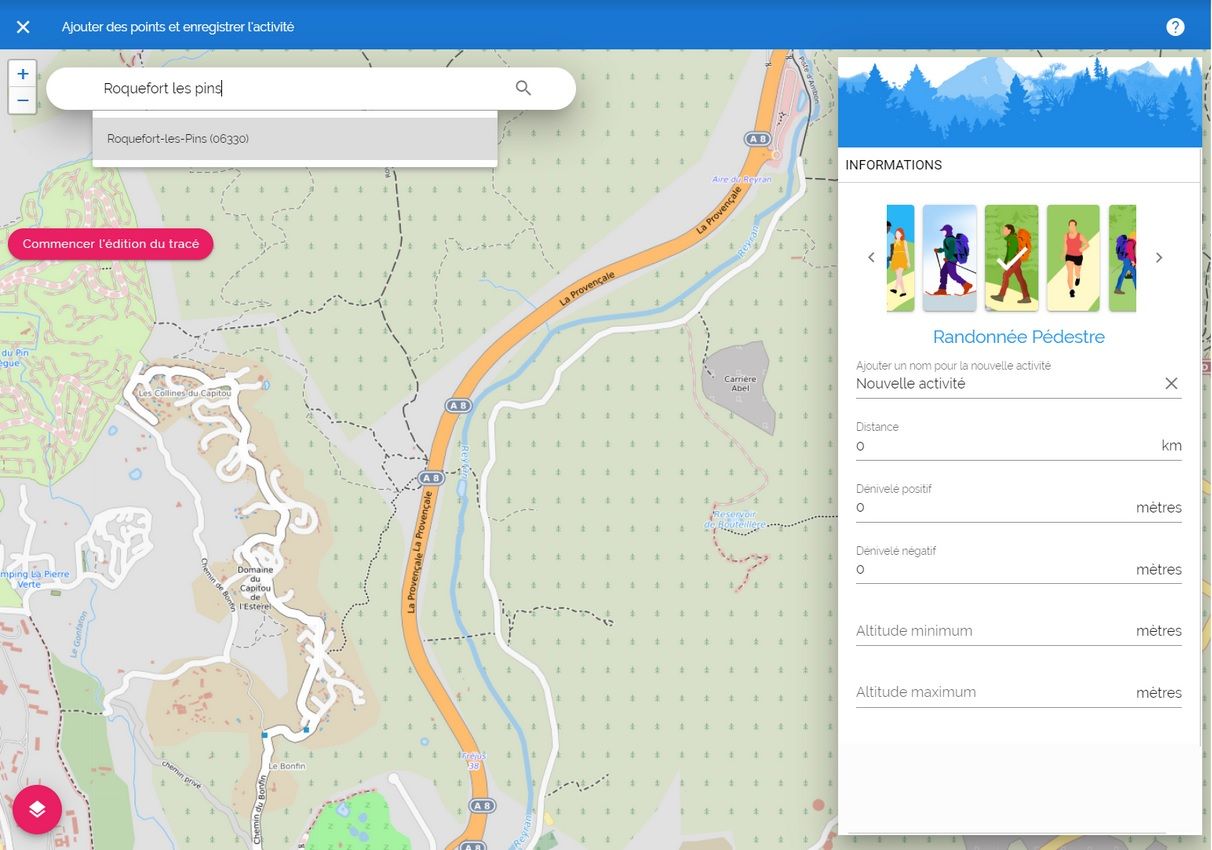
In the search field, I enter « Roquefort-les-pins, and validate the town among those in the list. The map zooms in at the right place, so I just have to look around.
Secret No. 2: Examine the place with the different available maps
Satellite, topographic, hiking, mountain biking, etc, each map brings its share of information to beautify the hike and say farewell to the eternal imposed « go and return » path: You can watch all trails around and thus create a loop.
The satellite map with its photographic rendering, offers a vision of the ground reality: dense vegetation, agricultural plains, rocky areas, habitations, and nearby road infrastructures, parking spaces.
The topographic map highlights the private spaces (fields, and grey or hatched buildings) green or natural spaces, trails (black lines) and trails (dotted lines); but its major asset lies in the height difference display, it is offered only with this map.
The hiking & mountain biking map is the most comprehensive. If you have to choose one, it is the only one to use: Not only different grounds like forests, meadows, private spaces, trail and road names are displayed, but also water spots, viewpoints, peaks, restricted access areas with gates, etc.
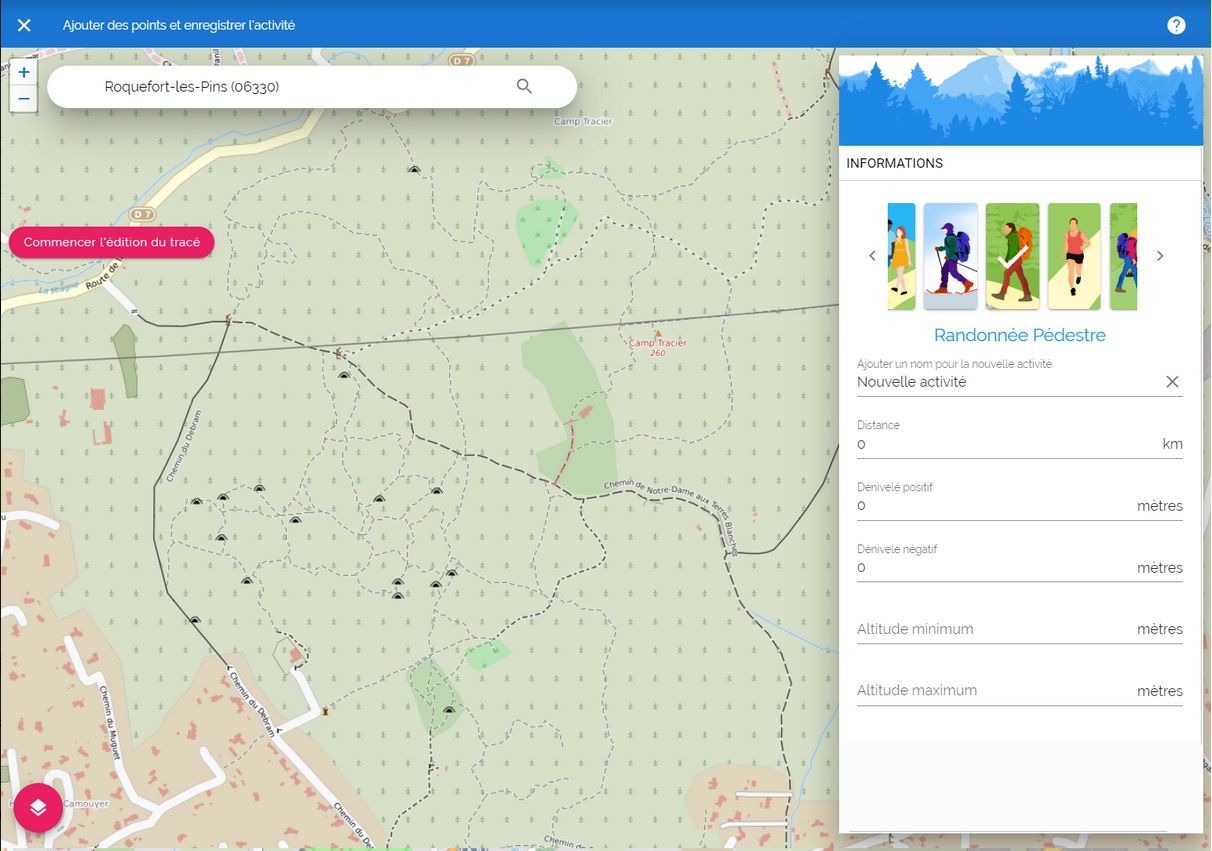
For my part, I select the “hiking & mountain biking” map because it displays all remains and archaeological sites. I move on the map, zoom in and zoom out, and then, it was the revelation: a Roman bath, the Tracier Camp strikes me. I search on Google, and I discover that it’s the name of one of the Roman camps in Roquefort-les-pins!
Secret No. 3: Create the route with full environment knowledge
Thanks to the activity creation on map, there is no bad surprise: While building the route, the mileage and the difference in height are automatically calculated for each added point. You can thus consider the different tracks located on the map and adjust within your ability and depending on your mood.
To start a trail, you must bear in mind to create the starting point close to a road where the trail is easy to access and where you will be able to park.
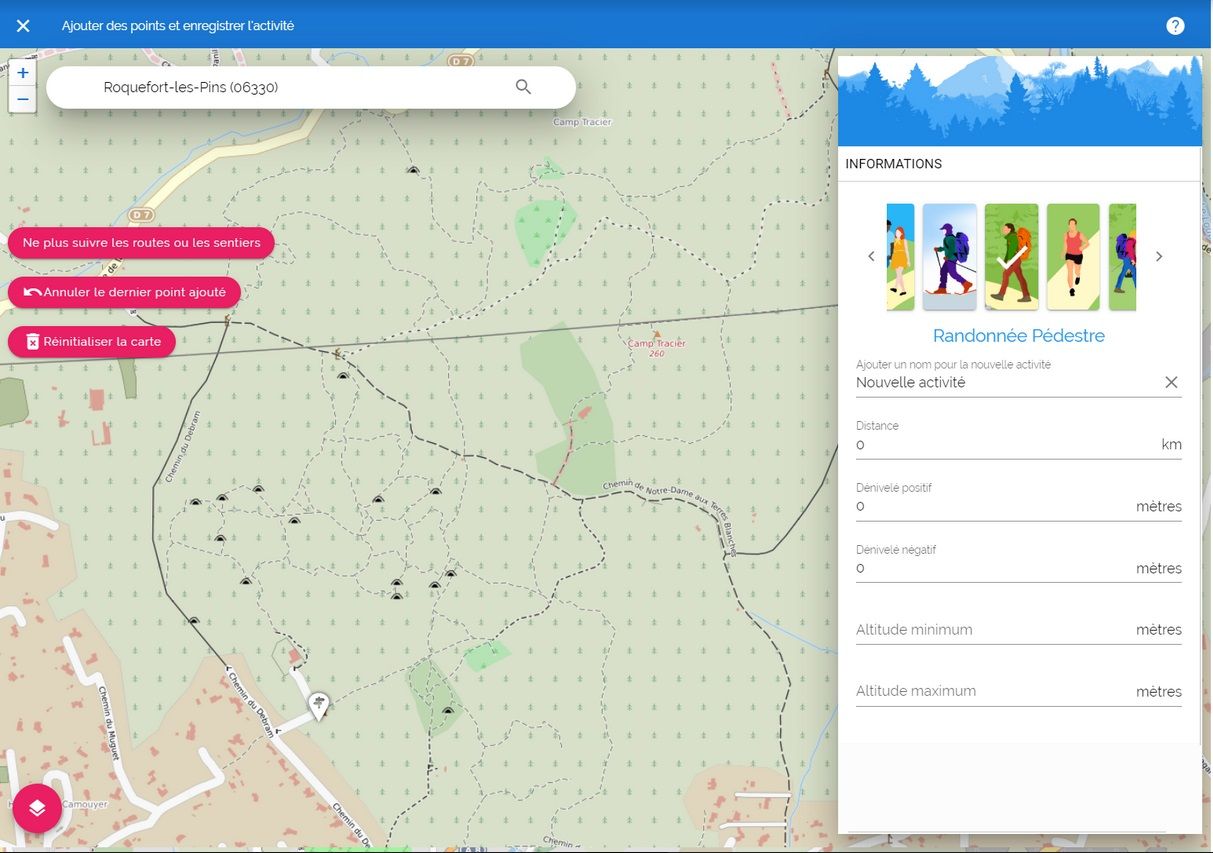
To make the creation easier, an option allows you to connect two points of the trail following the displayed paths. If you’re not satisfied with the trail, you can still "Cancel the latest added point" and create an intermediate point, or move to the “free drawing” mode with “Stop following the trail”.
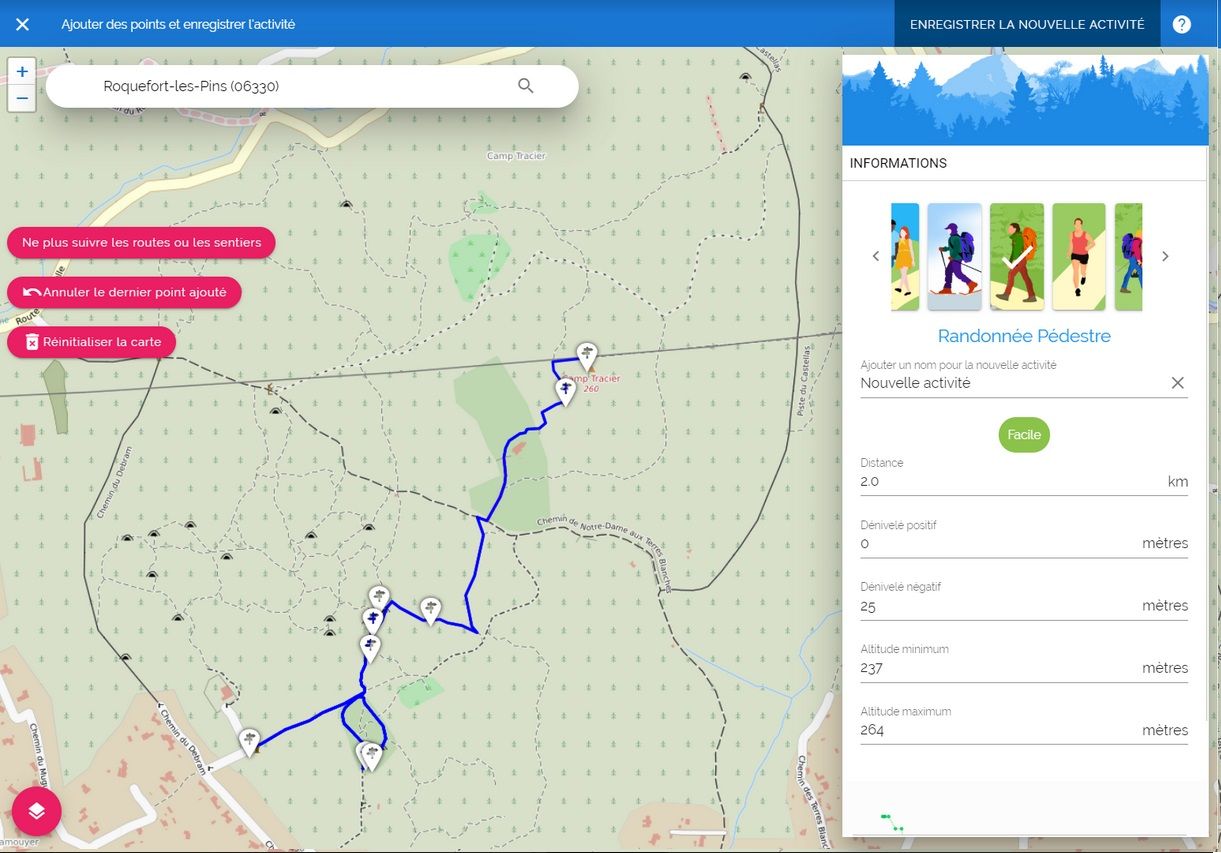
Now, it’s time for me to draw my hike: In the planning, I click / press the "Start editing trail" button. What is interesting here, is the presence of a car park located nearby. I create my starting point there.
When it’s done, I see if there are other elements to take into account to increase the interest of my hike: caves and sinkholes are displayed on the map. This could not be better! I add the points to my hike to walk by.
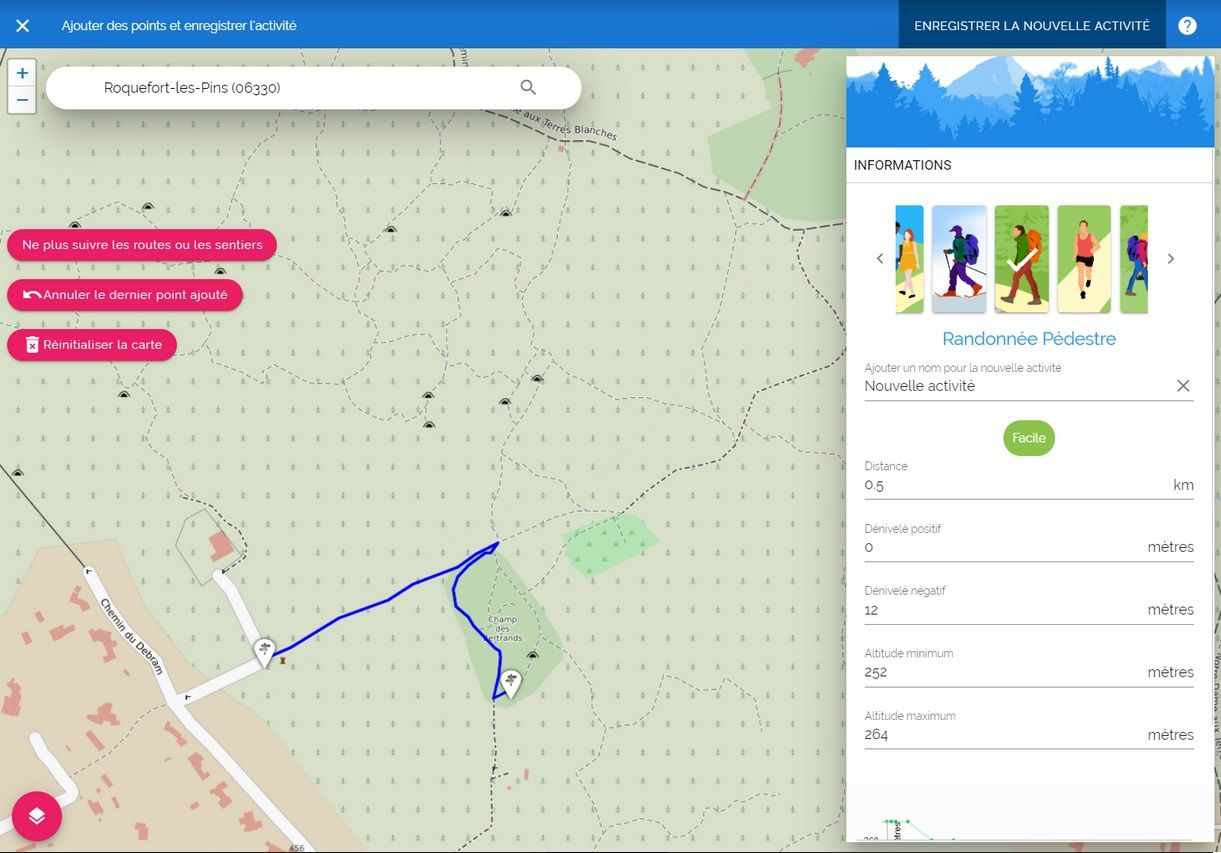
Now, I’m adding the last point of the Roman camp on top of the hill. Then, I cast a look on the mileage and the difference in height, to determine the hike difficulty. The trail is 2km long for an elevation of 25 m: easy, so I plan to explore other visible caves on the map before going back to my car.
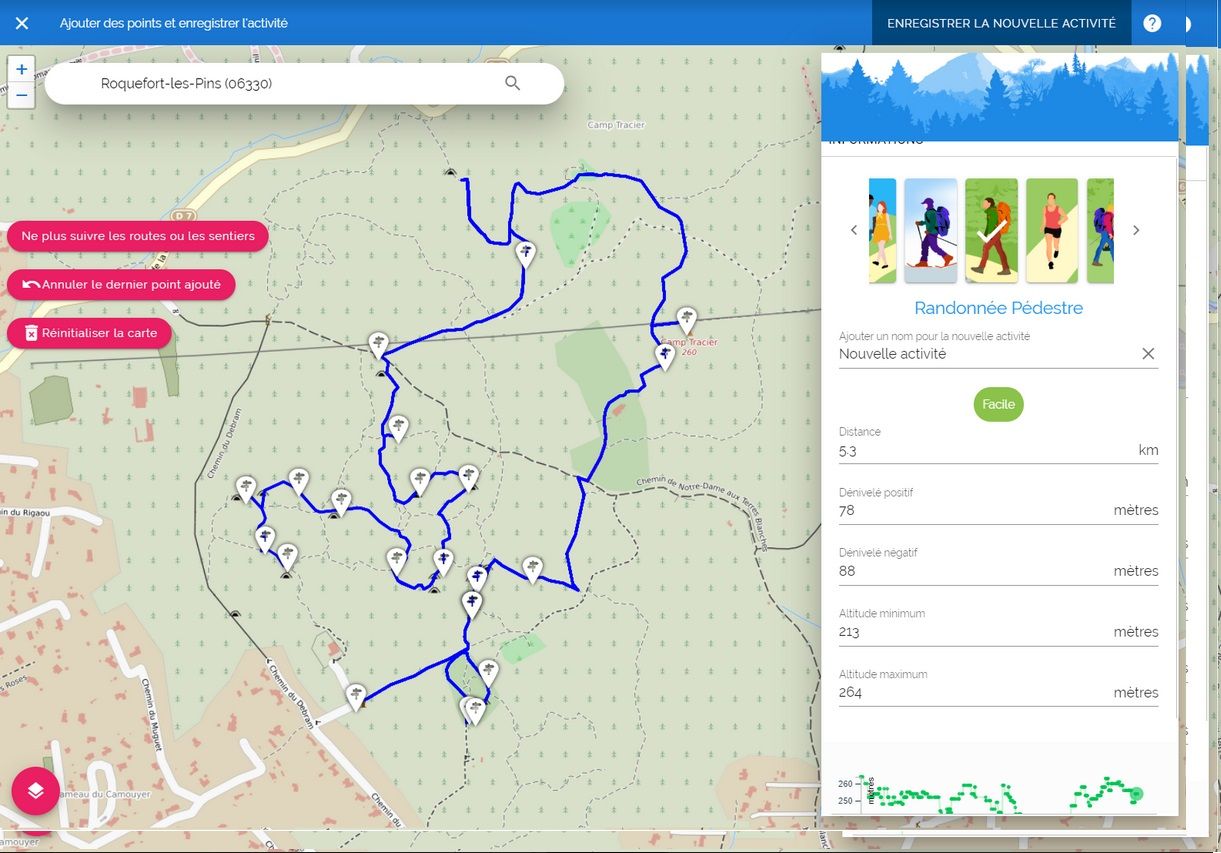
I finish my trail adding a last point to the hike starting point. The route is automatically calculated to the fastest. Overall, my hike is 5.6 km long for an elevation of 150 m. It’s enough, for now!
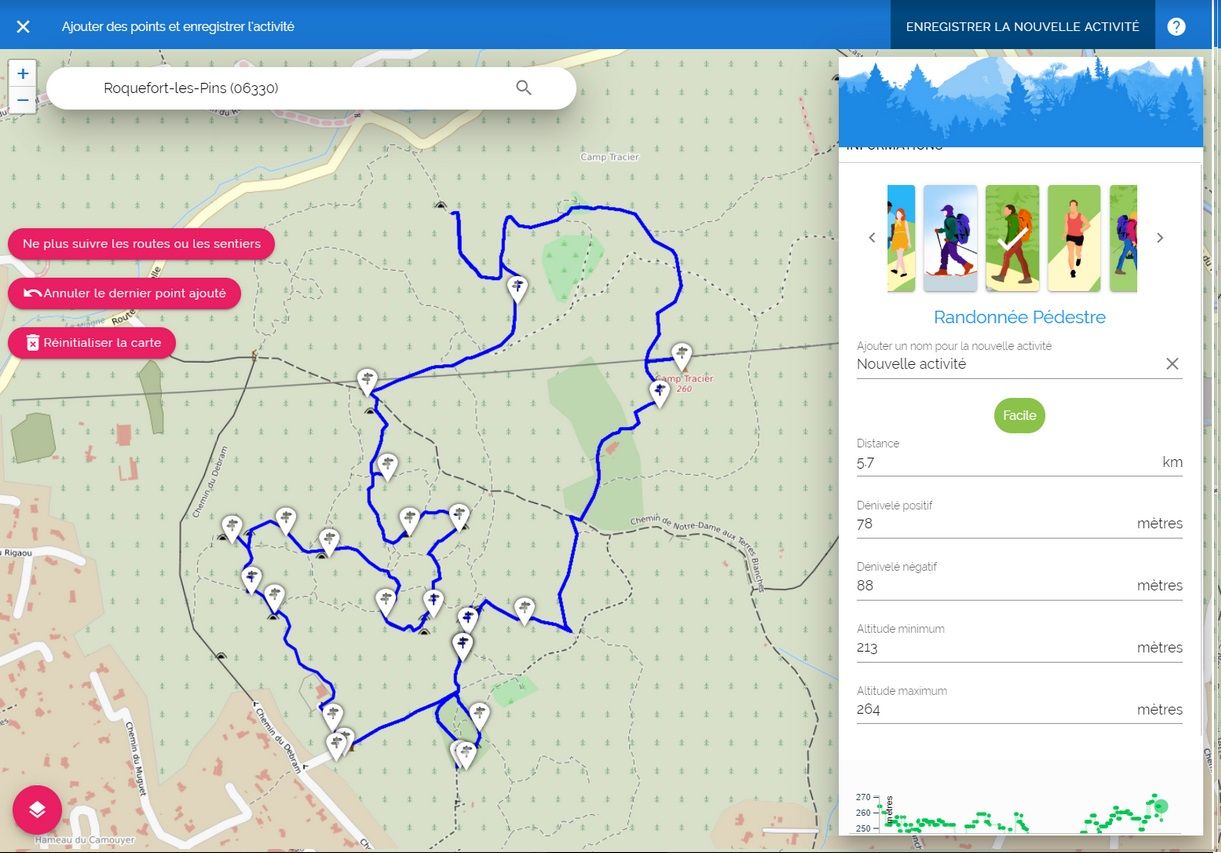
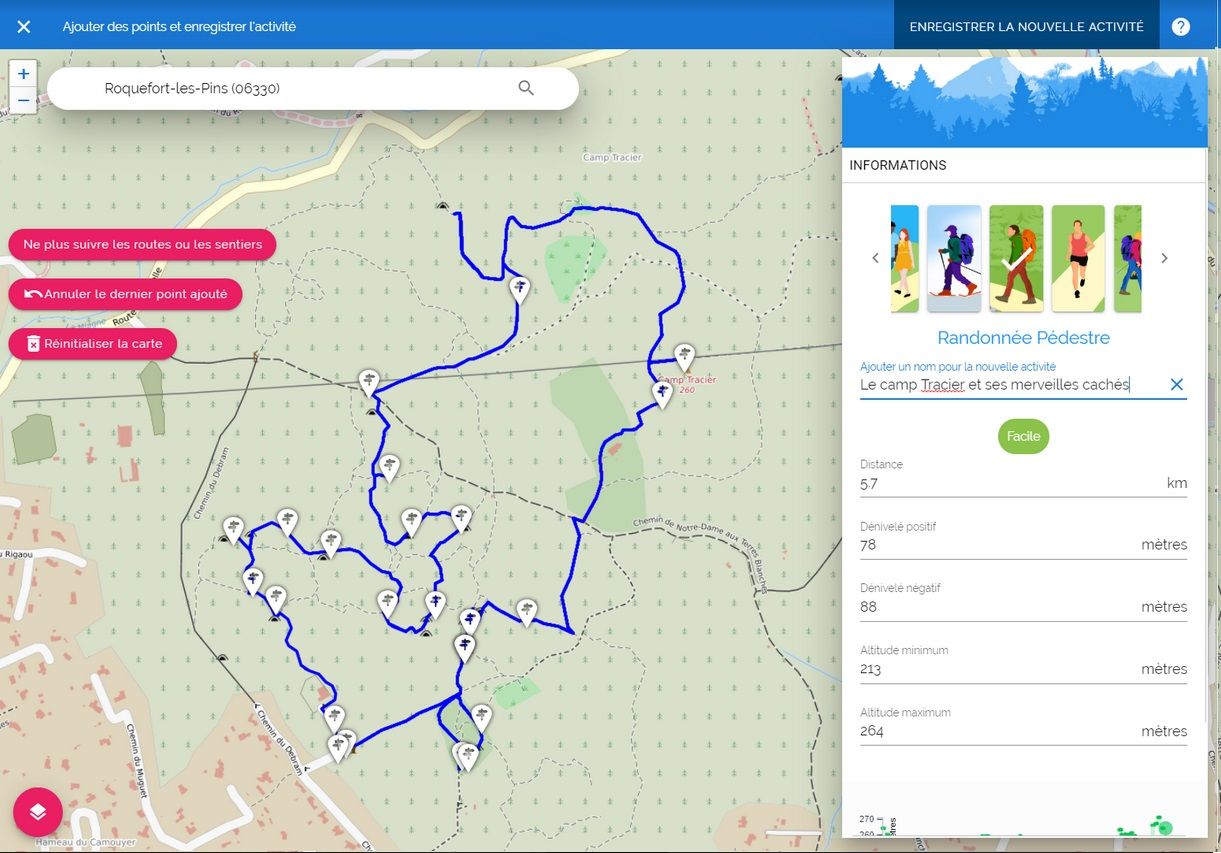
Finally, I give a cool name to my activity before saving it.
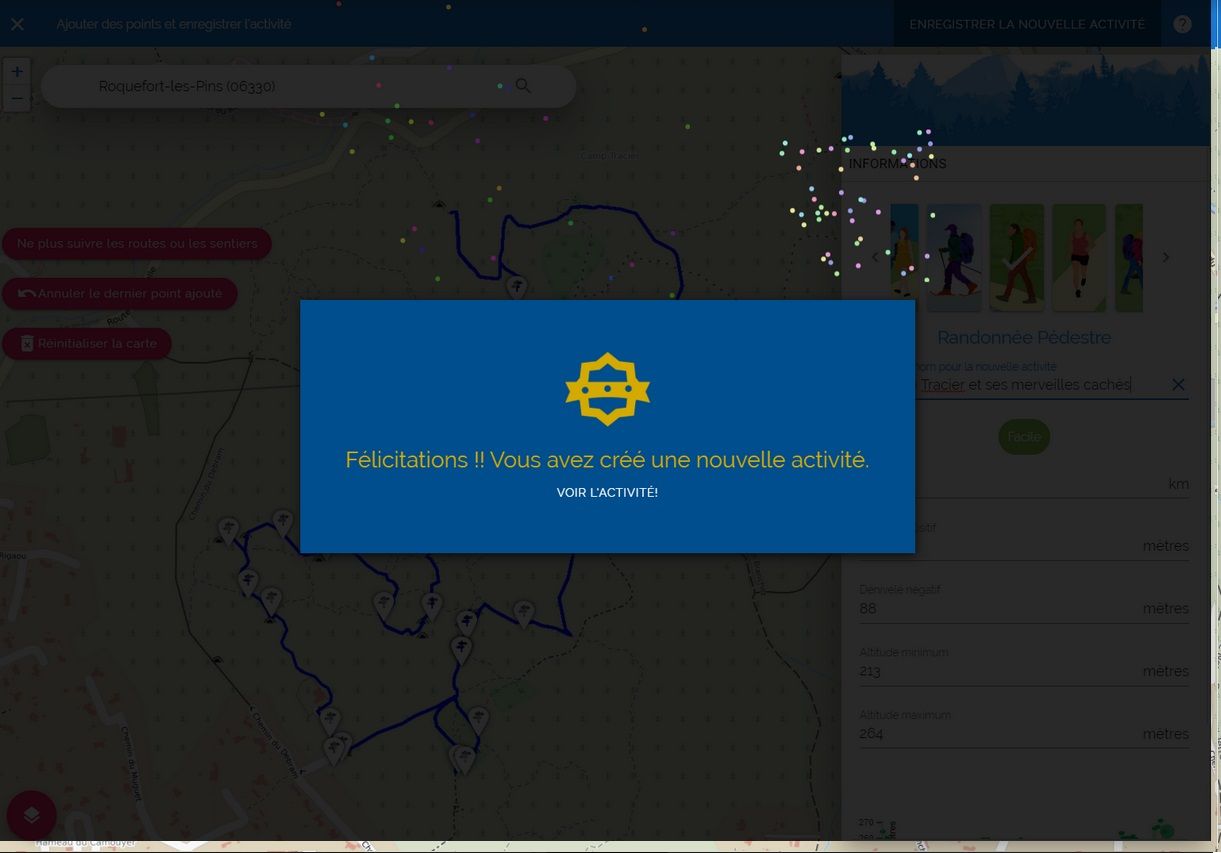
Secret No.4: Take good habits before the departure
On D-Day, it’s important to download the route in order to store your map even if there is no mobile network.
Take this opportunity to check the weather forecast on site and use the automatic tracking up to the starting point (with Waze, Gmap, Apple plan).
On my smartphone, I find my hike in the “My saved activities” topic. I click the activity drop-down menu and select “Download activity”, then I choose one background map or more (topographic, satellite, etc.) that I’d like to bring with me. Job's a good 'un! I risk nothing in venturing into the forest with my interactive map in the pocket!
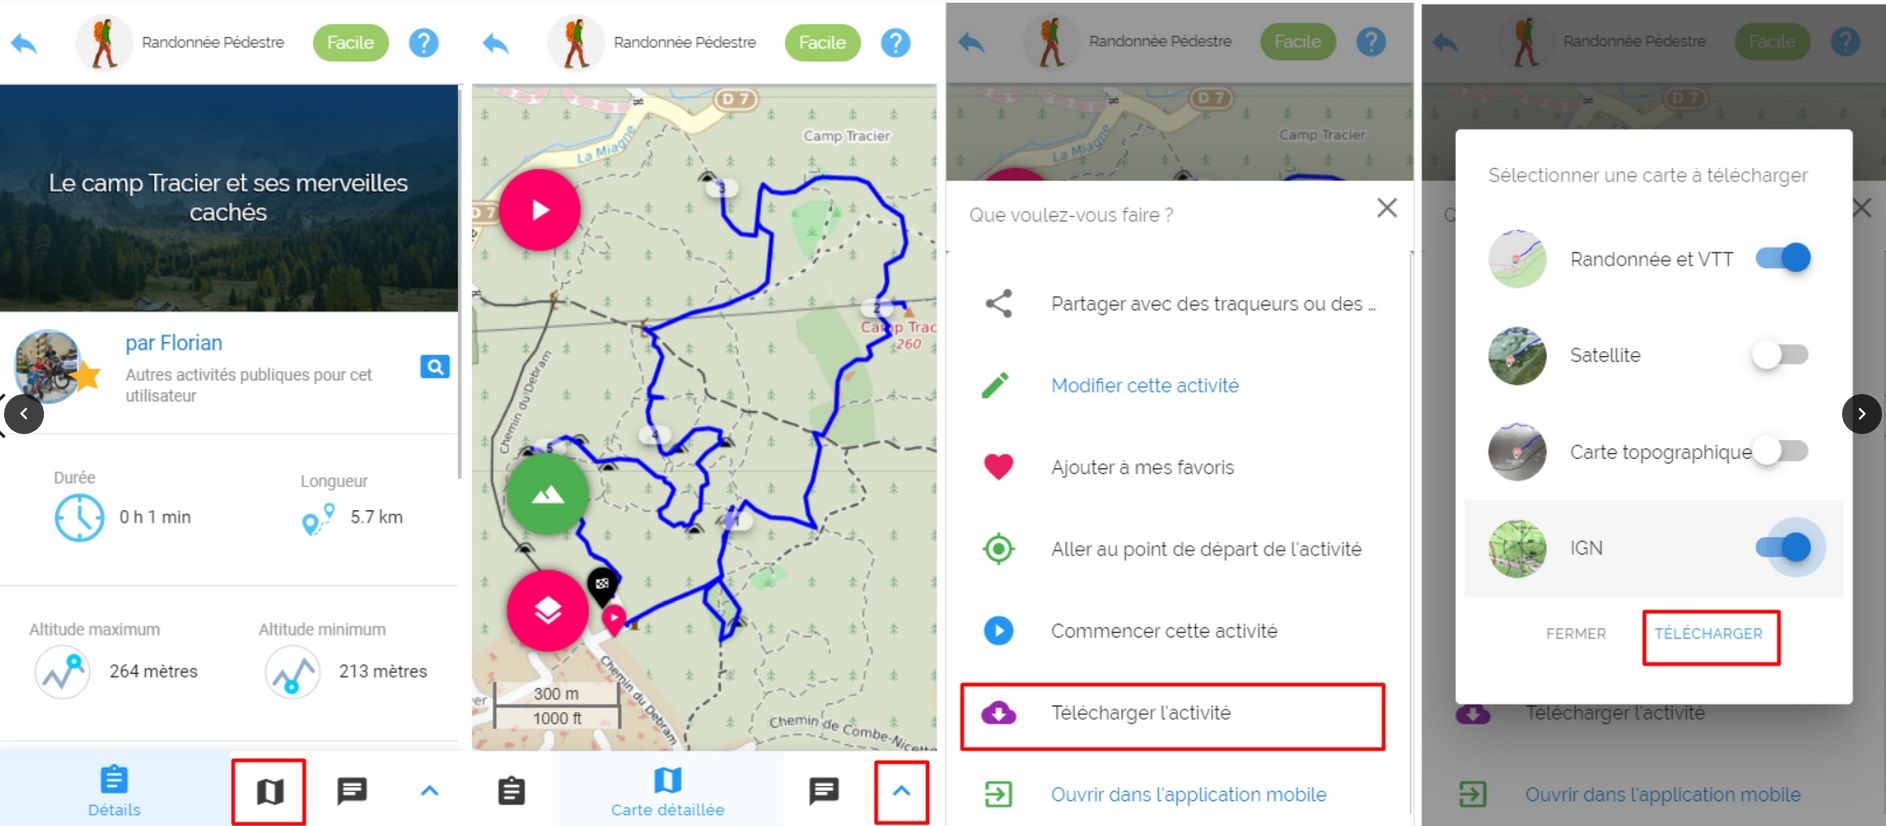
Before leaving, I choose "Go to activity starting point " in the activity menu, to reach the place that I flagged by myself.
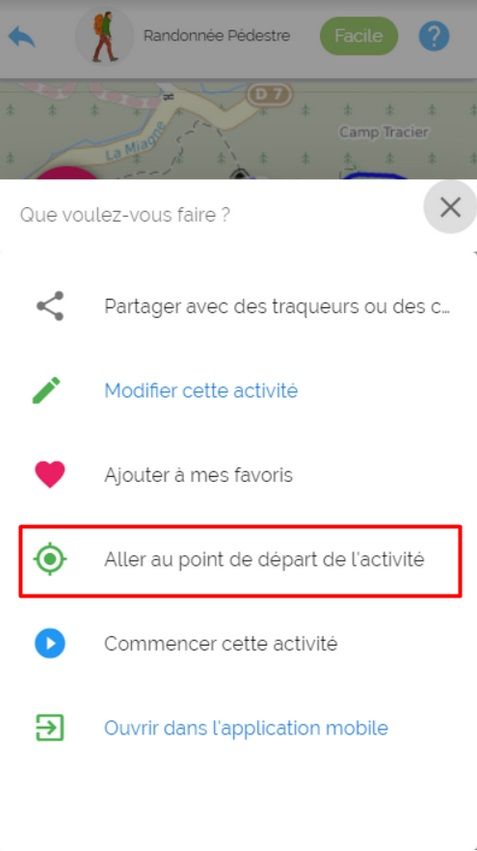
Once on the spot, I start the activity clicking / pressing the red button "Start activity" and I just have to let myself guided!
Now, you know all my planning secrets, you have no reason to stay at home watching TV.
Be the pioneer in discovering and mapping a new area!